By: André van der Merwe (SA Hunters Manager Branch and Shooting Matters)
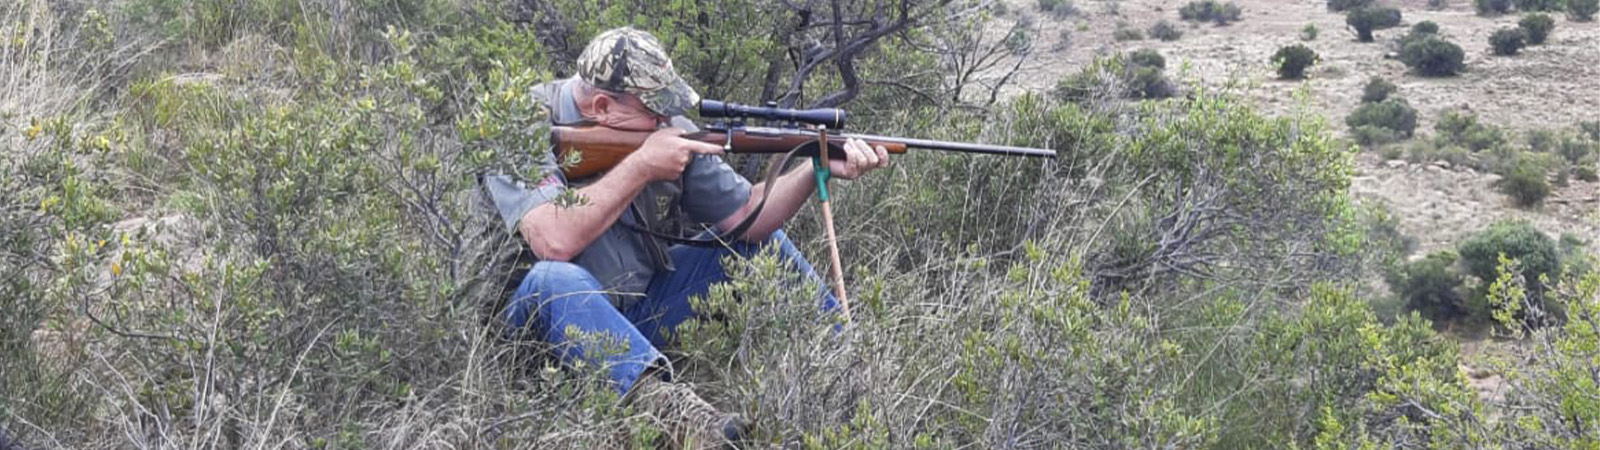
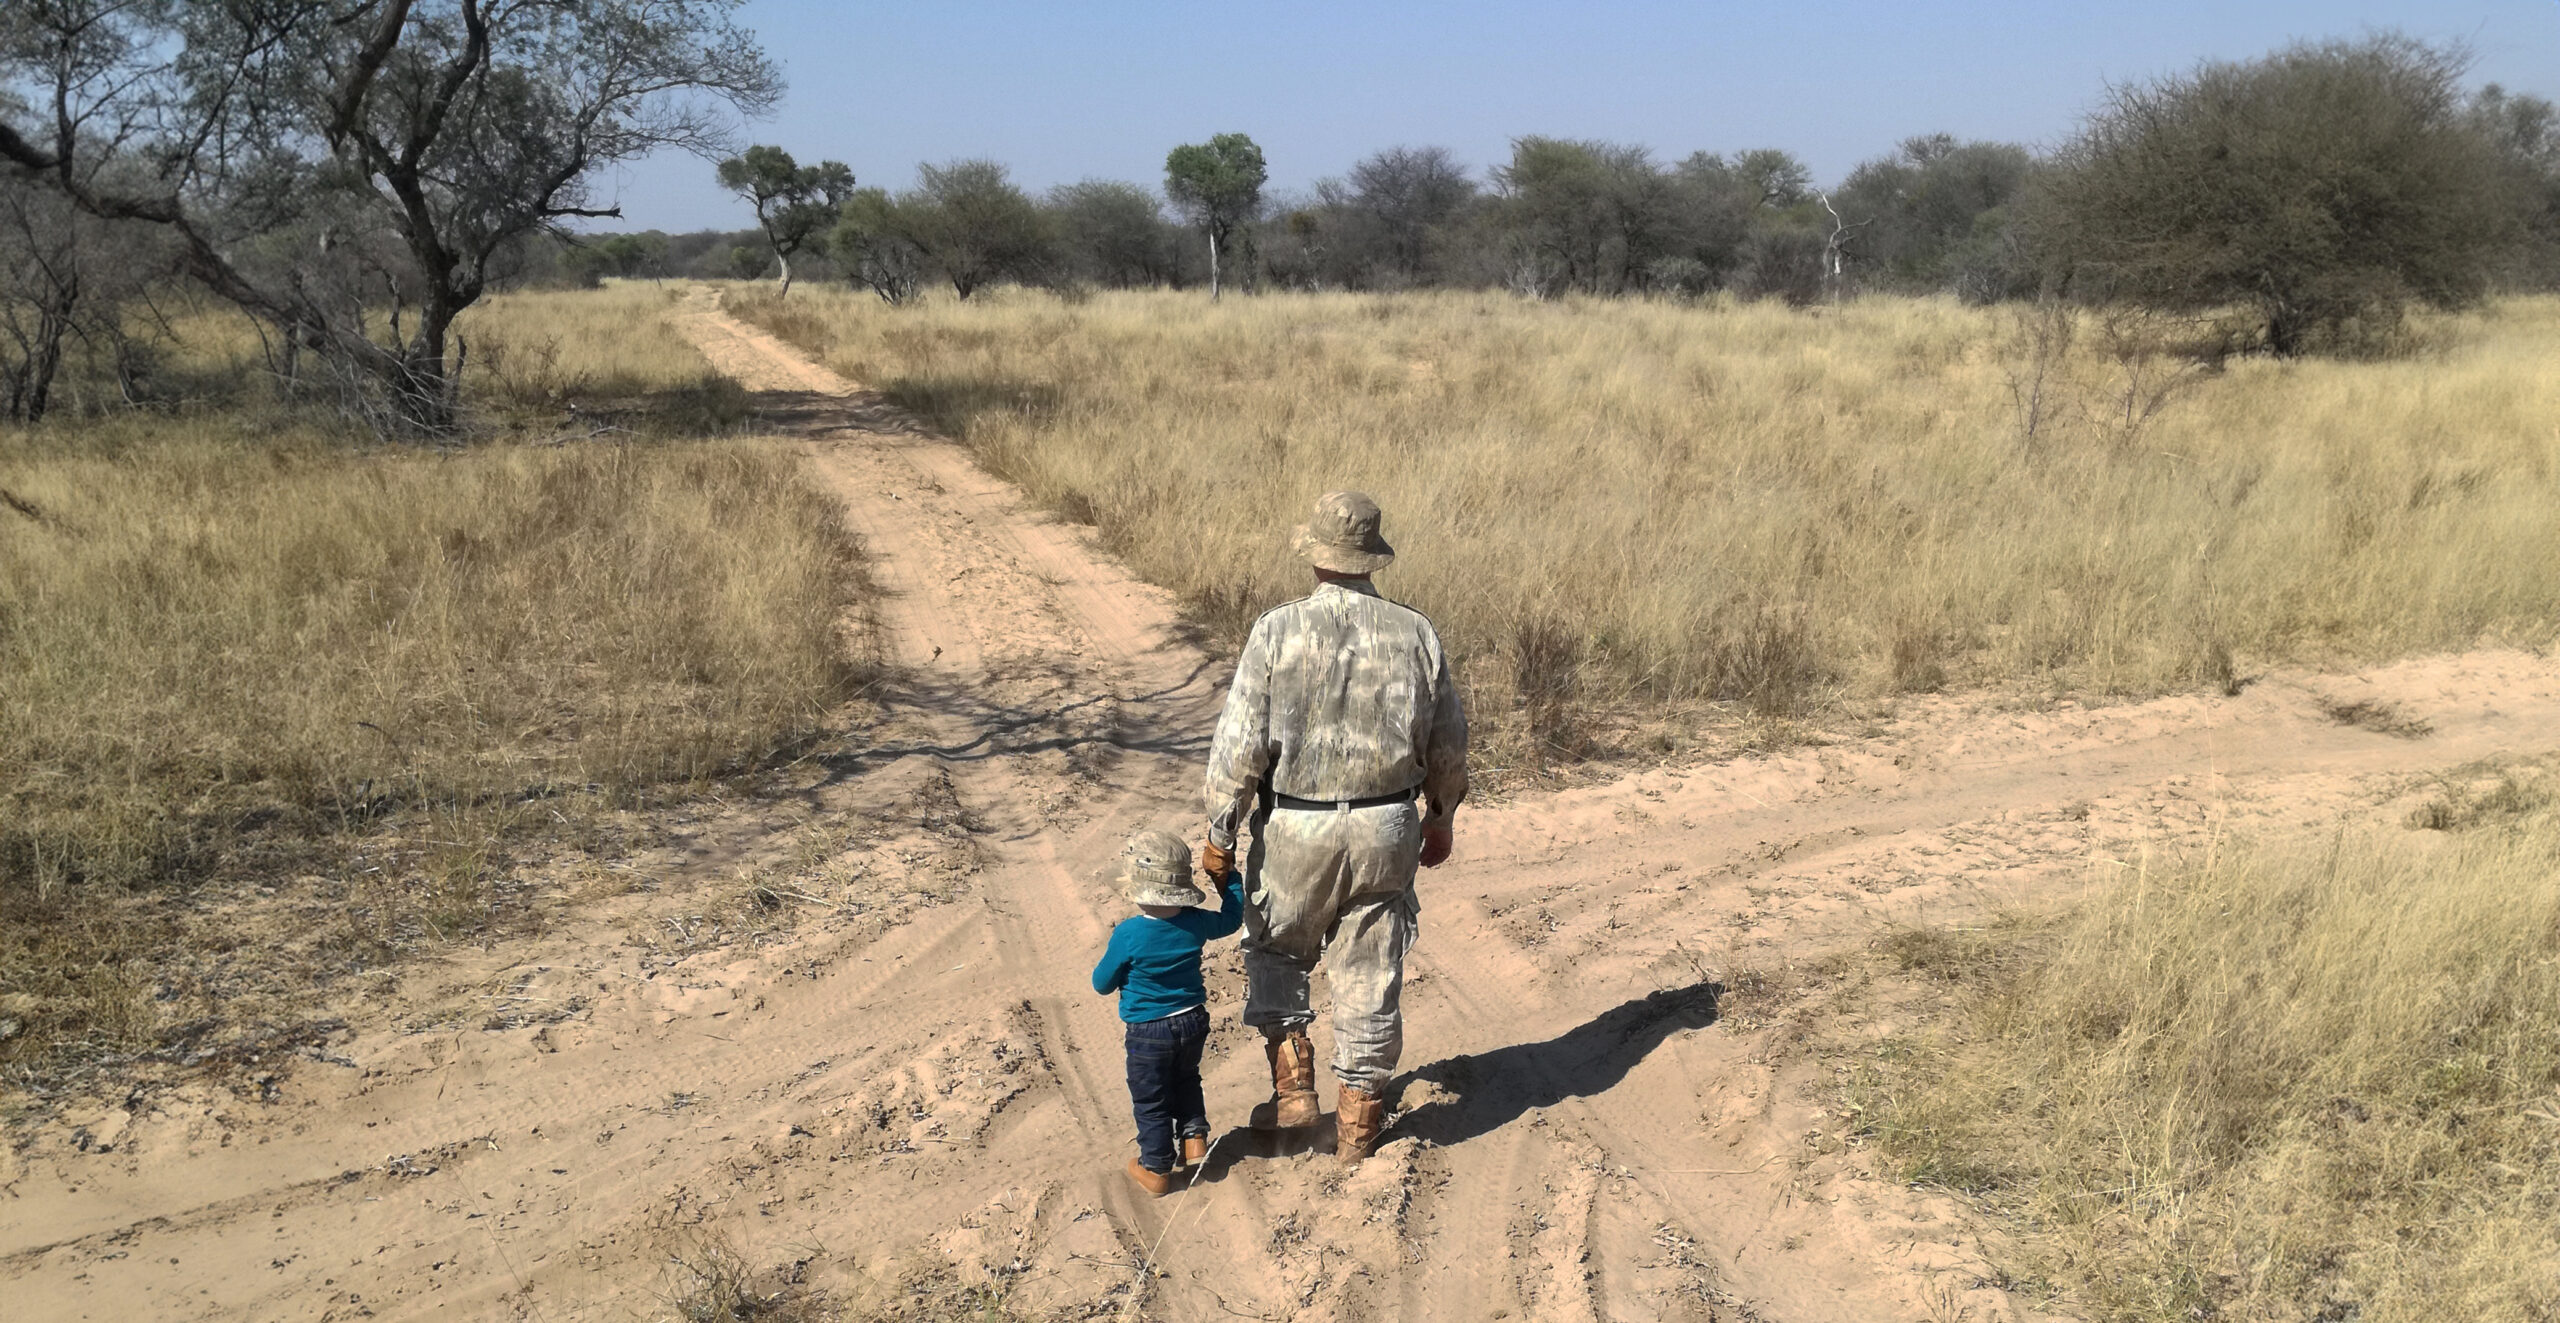
As a hunter, my favourite time is hunting all by myself, rifle over my shoulder in the bushveld, the early morning full of promise or later in the day the anticipation of finding my quarry before sunset. This article is about hunting in the Bushveld on foot using my hunting technique: walk, stop, search: walking slowly, stopping frequently to listen, look and search.
Table of contents
Every hunter has their preferred way of hunting
Every hunter has their preferred way of hunting and the habitats they enjoy hunting in. One often hears lengthy discussions or arguments condemning certain hunting methods as unethical. The reality is that everyone is entitled to their opinion and should hunt according to their convictions and what the landowner permits. The universal responsibility of hunters is to hunt within the framework of prevailing legislation. One aspect that deserves more attention is the hunter’s skills and using his equipment correctly to deliver a precise, accurate one-shot kill-shot.
When hunting springbuck in the Karoo, when I use the ambush method, I use my 6mm Remington with a 90-grain bullet at 3300 fps muzzle velocity for a flat trajectory over distances up to 300 metres. The rifle/scope/ammunition combination is zeroed at 200 m and 300 m, offering high accuracy with three-shot groupings of approximately 50 mm at 300 m. During an ambush hunt, I typically sit in one spot, preferably under or behind a bush on a chair with my rifle resting on a tripod. In this terrain (usually plains or flat ridges) I can spot a springbuck herd approaching from a distance and wait for them to come within shooting range. Usually, they are unaware of my presence. Once they are close enough, I select an animal and have enough time for an accurate shot. Of course, it doesn’t always go exactly as planned. The charm of hunting lies precisely in its unpredictability.
Walk-and-stalk hunting in the Bushveld
Walk-and-stalk hunting in the Bushveld requires thorough preparation to hunt successfully under different conditions – especially if it is your first time. Hunters often encounter animals at short distances (10 to 50 metres), which limits the opportunity to take a shot (3 to 5 seconds). The hunter’s ability to shoot quickly and accurately determines their success. Equipment needs to be as simple and practical as possible. This article focuses on the hunter’s practical shooting skills, their rifles, other equipment, and the shooting positions they can use effectively in the Bushveld.
My bushveld rifle
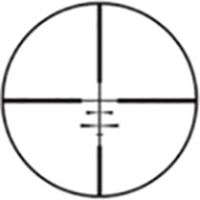
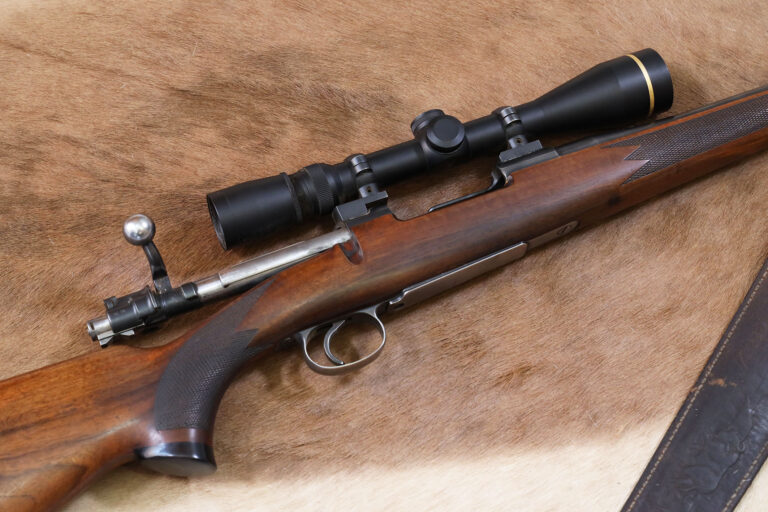
For Bushveld hunting, I zero my .30-06 Springfield at 100 m with a 163-grain monolithic Titan copper bullet at 2740 fps. From 10 to 100 m, the bullet’s trajectory never deviates more than 25 mm above or below the line of sight. The Boone & Crockett reticle on the 3.5-10×40 Leupold scope is set with the main crosshair zeroed at 100 m, the first line below the crosshair is the 200 m aiming point, and the next lower line is the 300 m aiming point, both calibrated for the scope’s 10x magnification. Although short-range shots (up to 100 m) are the norm in the Bushveld, this setup equips me for shots up to 300 m (e.g., a longer shot at a ridge or hill).
K98 Musgrave .30-06 Springfield with 3.5-10x40 Leupold-telescope
Boone & Crockett crosshair
Scope
The 3.5-10×40 Leupold scope is compact with excellent optical quality, with size and weight (370 grams) that is well-suited to the .30-06 Sprg Musgrave for a relatively lightweight combination (4.2 kg total weight) for walk-and-stalk hunting. Large scopes with more than 10x magnification have more drawbacks than advantages for hunting at shorter distances. For bushveld hunting over short distances, a magnification of 2x to 4x is preferable (better too low than too high). The field of view at 3.5x magnification is nearly 10 m in diameter compared to the 4 m diameter at 10x magnification. The greater the magnification, the smaller the field of view. A larger field of view at lower magnification makes locating the target for a quick shot much easier.
Example: try quickly focusing on a target within 20 m of you from a free-standing position using 16x or 20x magnification. Then repeat the exercise with a 2x or 3x magnification scope.
3.5-10x40 Leupold scope with Boone & Crockett reticle
Tracking the target through the scope
Many shottists are unaware that they struggle to locate a target through the telescope. Whether aiming at a target on the shooting range from a shooting table or during a guided hunt in the Karoo, shooters often fail to recognise how much time they spend searching for the target through the scope. In situations requiring quick shots at game over a short range there’s no time to waste trying to find the target.
The issue often stems from the shooter’s natural (automatic) alignment being off-target. But what does this mean, and how can it be corrected? To address this, assume a standing shooting position with a rifle that has an open bolt, an empty magazine, and an empty chamber. Aim the rifle at a convenient target while looking through the telescope, then close your eyes and relax your body. When you open your eyes and look through the telescope again, it will reveal your natural alignment. If your rifle does not align with the target, adjust the position of your feet until the rifle’s natural alignment coincides with the target. This technique applies to prone, sitting, and kneeling shooting positions.
Why is natural alignment so important? Example: the shooter adopts a position where the picture through the scope is to the left of the aiming point. The shottist tries to correct it without adjusting his feet or body and forces the rifle to the right to align with the aiming point. This creates an unnatural position where the muscles are under tension. When the shottist fires, his body tends to relax to the left, causing the shot to land left of the aiming point. Practice natural alignment until it becomes second nature.
When the shottists instinctively adopts the natural alignment every time, it becomes easier to develop the second component: getting on the target quickly. Starting from the natural alignment, keep your eyes on the target and raise the rifle from the ready position to your shoulder in the free-standing shooting position. With the rifle in shooting position, look over the scope at the target, keeping both eyes on the target. Lower your head, place your cheek against the stock, and aim through the scope. You should be on or very close to your aiming point on the target, requiring only minor adjustments up or down, left or right. With practice, you will learn to locate a target through your scope at any distance quickly. The secret is to obtain the correct natural alignment keeping both eyes on the target for as long as possible while bringing the rifle to your shoulder to take the shot. A shooter who perfects this technique can do it within seconds.
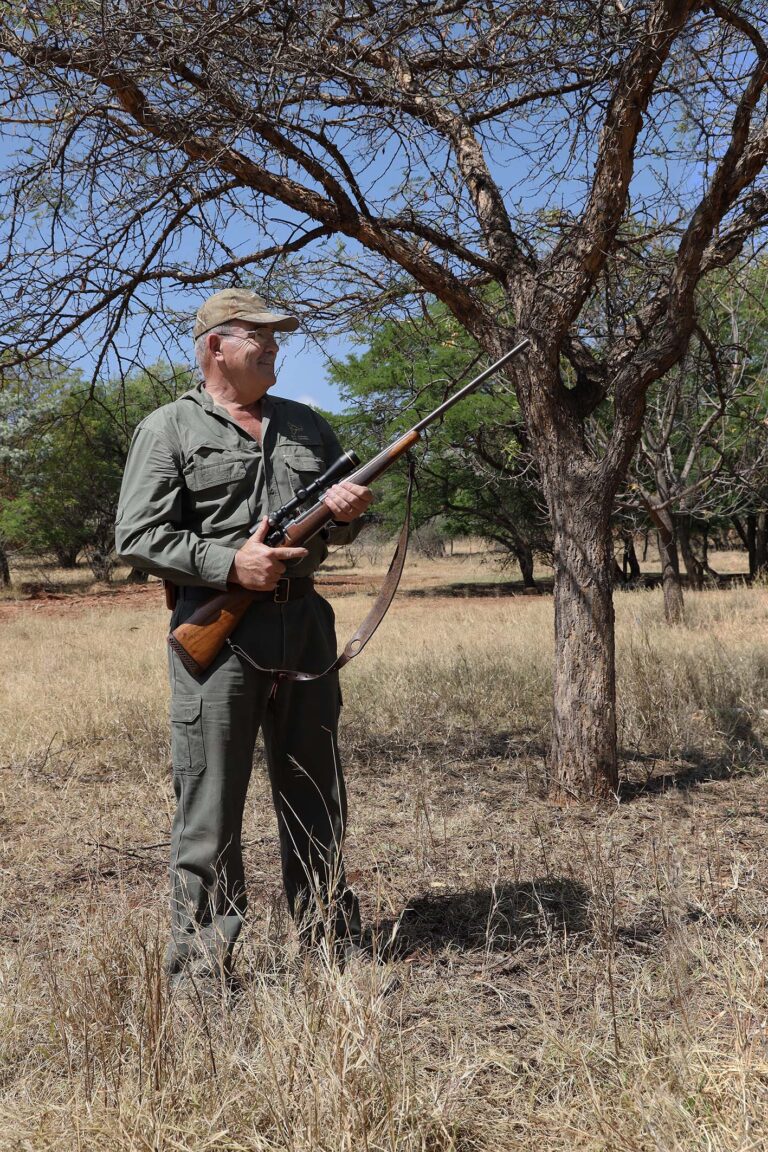
Ready position with the rifle stock on the hip, eyes on the target and the muzzle end of the barrel lined up between the eyes and the target.
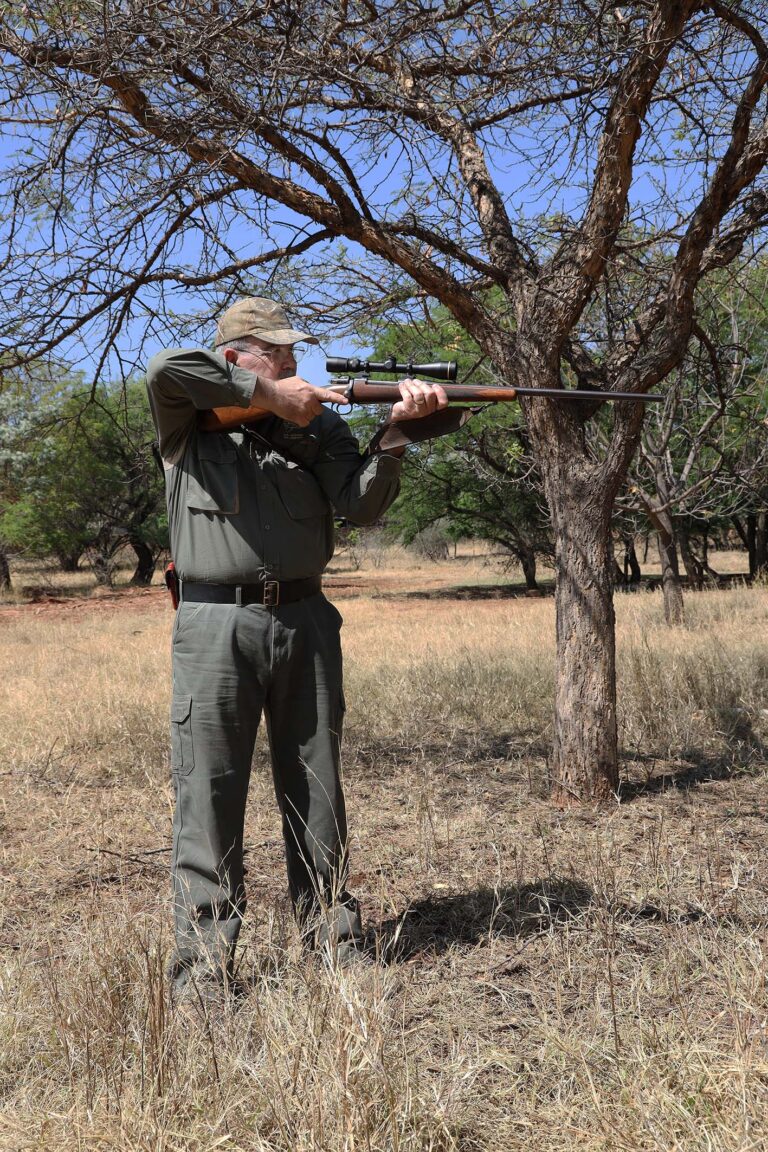
With the rifle in your shoulder, with both eyes open looking over the telescope at the target, adjust your natural direction if necessary.
Lower your head in position with your cheek against the stock, aim through the telescope and find your target, make small adjustments to be on target if necessary, and shoot.
Rifle sling
I use a rifle sling to carry my rifle (I prefer a wide and thick leather sling) over my shoulder when I spend long days in the veld. There are a few instances where I might shoot from a seated position over longer distances when I wrap the sling around my forearm for added stability. However, for hunting dangerous game, it is advised not to have a sling on your rifle because it can get in the way when you need to shoot quickly, especially when hunting dangerous game. A rifle sling in the wrong place and time can mean the difference between life and death.
Suppressor
A bushveld rifle should feel like a natural extension of yourself with a balanced and compact design. A suppressor disrupts that balance and increases the size of the setup. Firstly, it makes the rifle significantly longer (up to 300 mm, depending on the type of suppressor), and heavier (up to 500 grams) and alters its balance. It makes a big difference when carrying a rifle all day and when you need to respond quickly for an accurate shot. Furthermore, a rifle with a suppressor attached to it, carried over your shoulder may snag on trees and bushes.
Muzzle brakes
Muzzle brakes on bushveld hunting rifles are a controversial topic. Muzzle brakes reduce the recoil of magnum and heavy calibre rifles against the shoulder and cheekbone. Traditional muzzle brakes that redirect sound, gas, and solid particles such as unburned powder and copper fragments to the side are detrimental and dangerous to bystanders. Guides, professional hunters, and non-hunters accompanying hunters must be warned not to stand near or beside the muzzle brake when a shot is fired. The potential consequences should be explained to them in detail. Even with eye and ear protection (usually not worn during a hunt), it is a highly unpleasant experience that can cause serious damage to a person’s eyes and ears. Therefore, if you hunt with a muzzle brake on your rifle ensure that the bystanders are out of harm’s way.
Bipod on your bushveld rifle
A bipod on a bushveld rifle is to me like towing a trailer with a Porsche. It’s impractical and gets in the way. Using a bipod has its benefits in certain situations. Bushveld hunting is not one of them.
Use of a rangefinder in the bushveld
For bushveld hunting, a rangefinder is unnecessary and often just extra equipment to carry for the following reasons: first, within 100 metres, the exact distance is not critical with a rifle zeroed at 100 metres, and second, you don’t have time to fiddle with a rangefinder. It’s just another movement that can alert the animal and ruin your chance of a shot.
Miscellaneous equipment
Binoculars, a pocketknife, extra ammunition, a hat, a water bottle, and a two-way radio are the only additional items I take. When I hunt, I use a cell phone only when necessary, such as to take photographs or to make an emergency call. The rest of the time, the phone is turned off, and I focus on the hunt! Binoculars are handy for spotting animals at short distances in thick bush, or for assessing the horn length of a trophy animal.
Practical shooting positions
If your bushveld rifle/scope/ammunition combination consistently produces three-shot groups of 50 mm at 100 metres and 100 mm, or smaller at 200 metres from a shooting bench, your equipment is ready for bushveld hunting. While a more accurate rifle can provide peace of mind — sometimes a false sense of it — other factors play a greater role in overall accuracy than a rifle capable of 10 mm groups at 100 metres. At this stage, further shooting practice should focus on refining the hunter’s shooting skills for bushveld conditions.
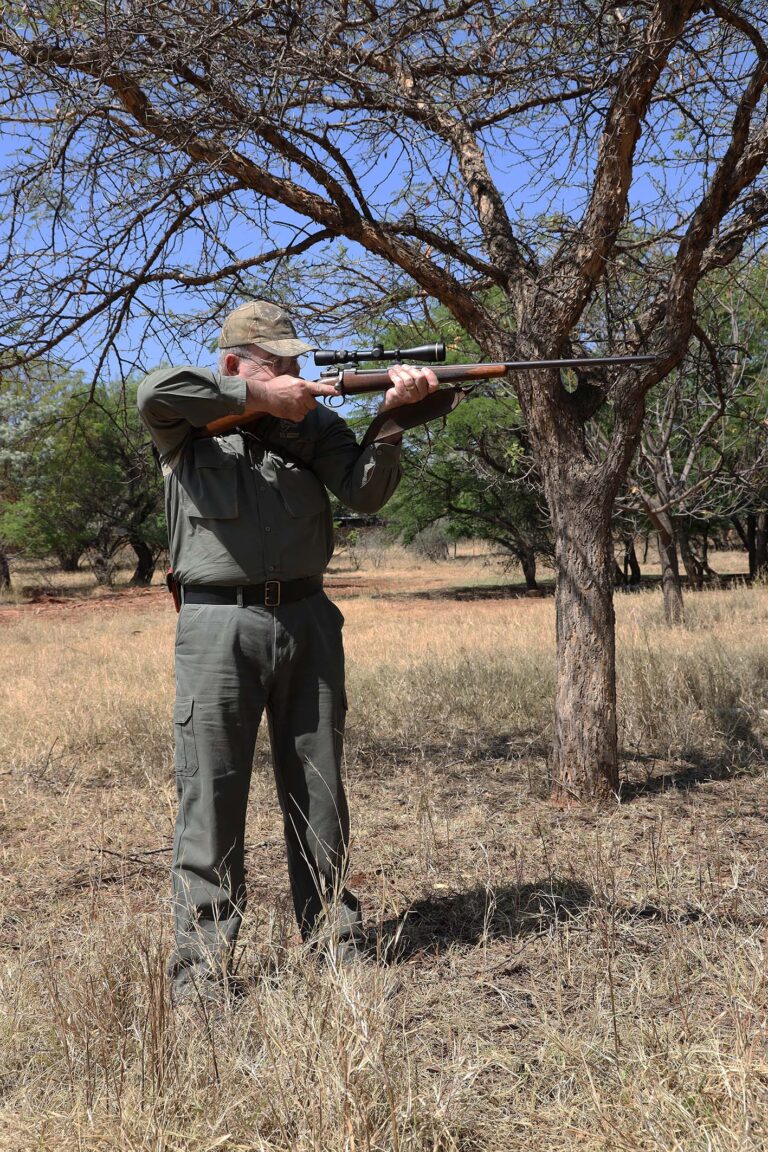
Many shots during a bushveld hunt are taken from a standing position. Few hunters spend enough time practising freehand standing shots (without support) to guarantee a one-shot kill every time. The counterargument is often that a tree in your surroundings can be used for a dead rest. If you hunt regularly in the bushveld, you will know that a convenient tree with a branch in the right position and at the right height when you need it is not as readily available as commonly assumed. Furthermore, you don’t always have the time to find the right tree or branch.
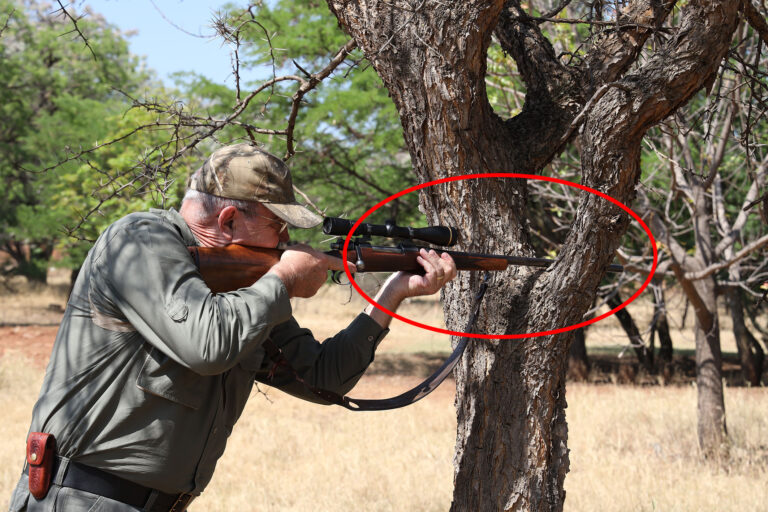
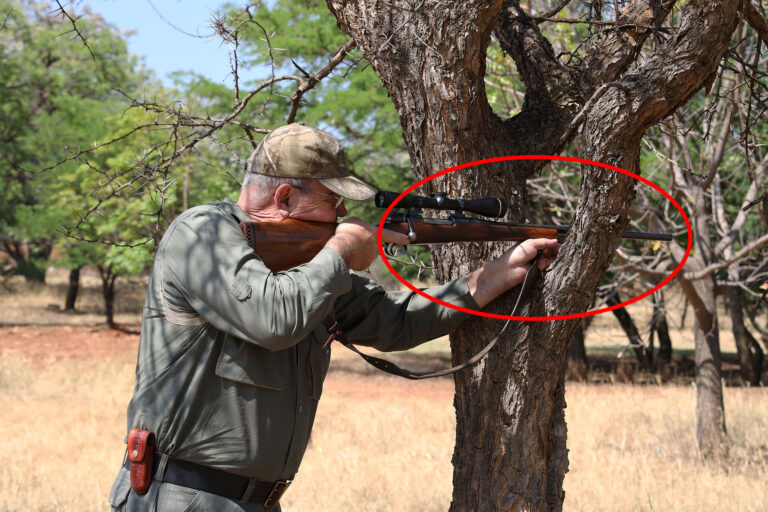
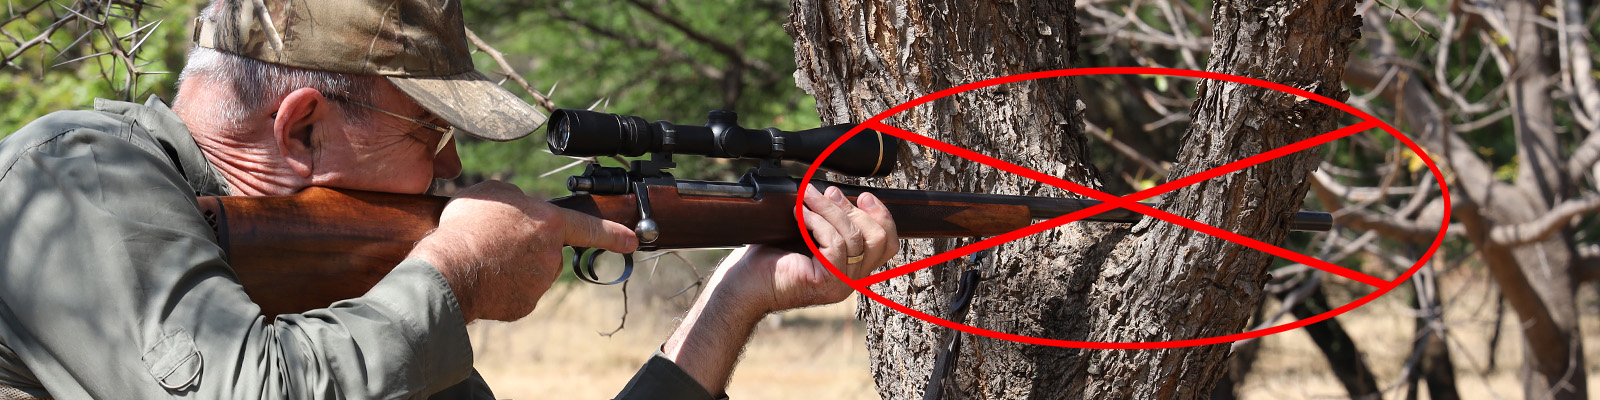
When using a tree for support when taking a shot, do not rest the barrel directly on a branch because it interferes with the barrel’s vibrations, and you will miss your aiming point. Instead, place your hand, a cap, bush hat, or even a backpack to support the rifle stock when shooting over a branch, rock or termite mound.
Do not rest the rifle barrel directly on a branch
Put your hand or a hat under the rifle stock for support
Using the guide’s shoulder for support: You can also use the guide’s shoulder as support, provided he stands very still. In such situations, the guide must wear ear protection. However, this is not always practical during a hunt. If the guide tries to cover his ears with his hands during the shot, he will not stand firmly and any movement he makes at the moment the shot is fired will affect the bullet’s accuracy. I prefer not to use this method.
Using the guide’s shoulder for support
Shooting sticks
Shooting sticks offer a simple solution to support your rifle while hunting. You can practise with sticks until you are familiar with this method and use them in any position for an accurate shot. A wide variety of shooting sticks are available to buy and a number of variations you can make yourself. How do you choose the right one for your needs? If you always hunt with a guide who carries and sets up your shooting stick, you can consider other versions. I carry my own shooting stick and use simple and practical models.
Single shooting stick: Until about 2019, I hunted with a single shooting stick made of a round 25 mm diameter wooden stick, approximately 1.8 m long with which I could confidently take accurate shots up to 150 metres from the freehand standing position.
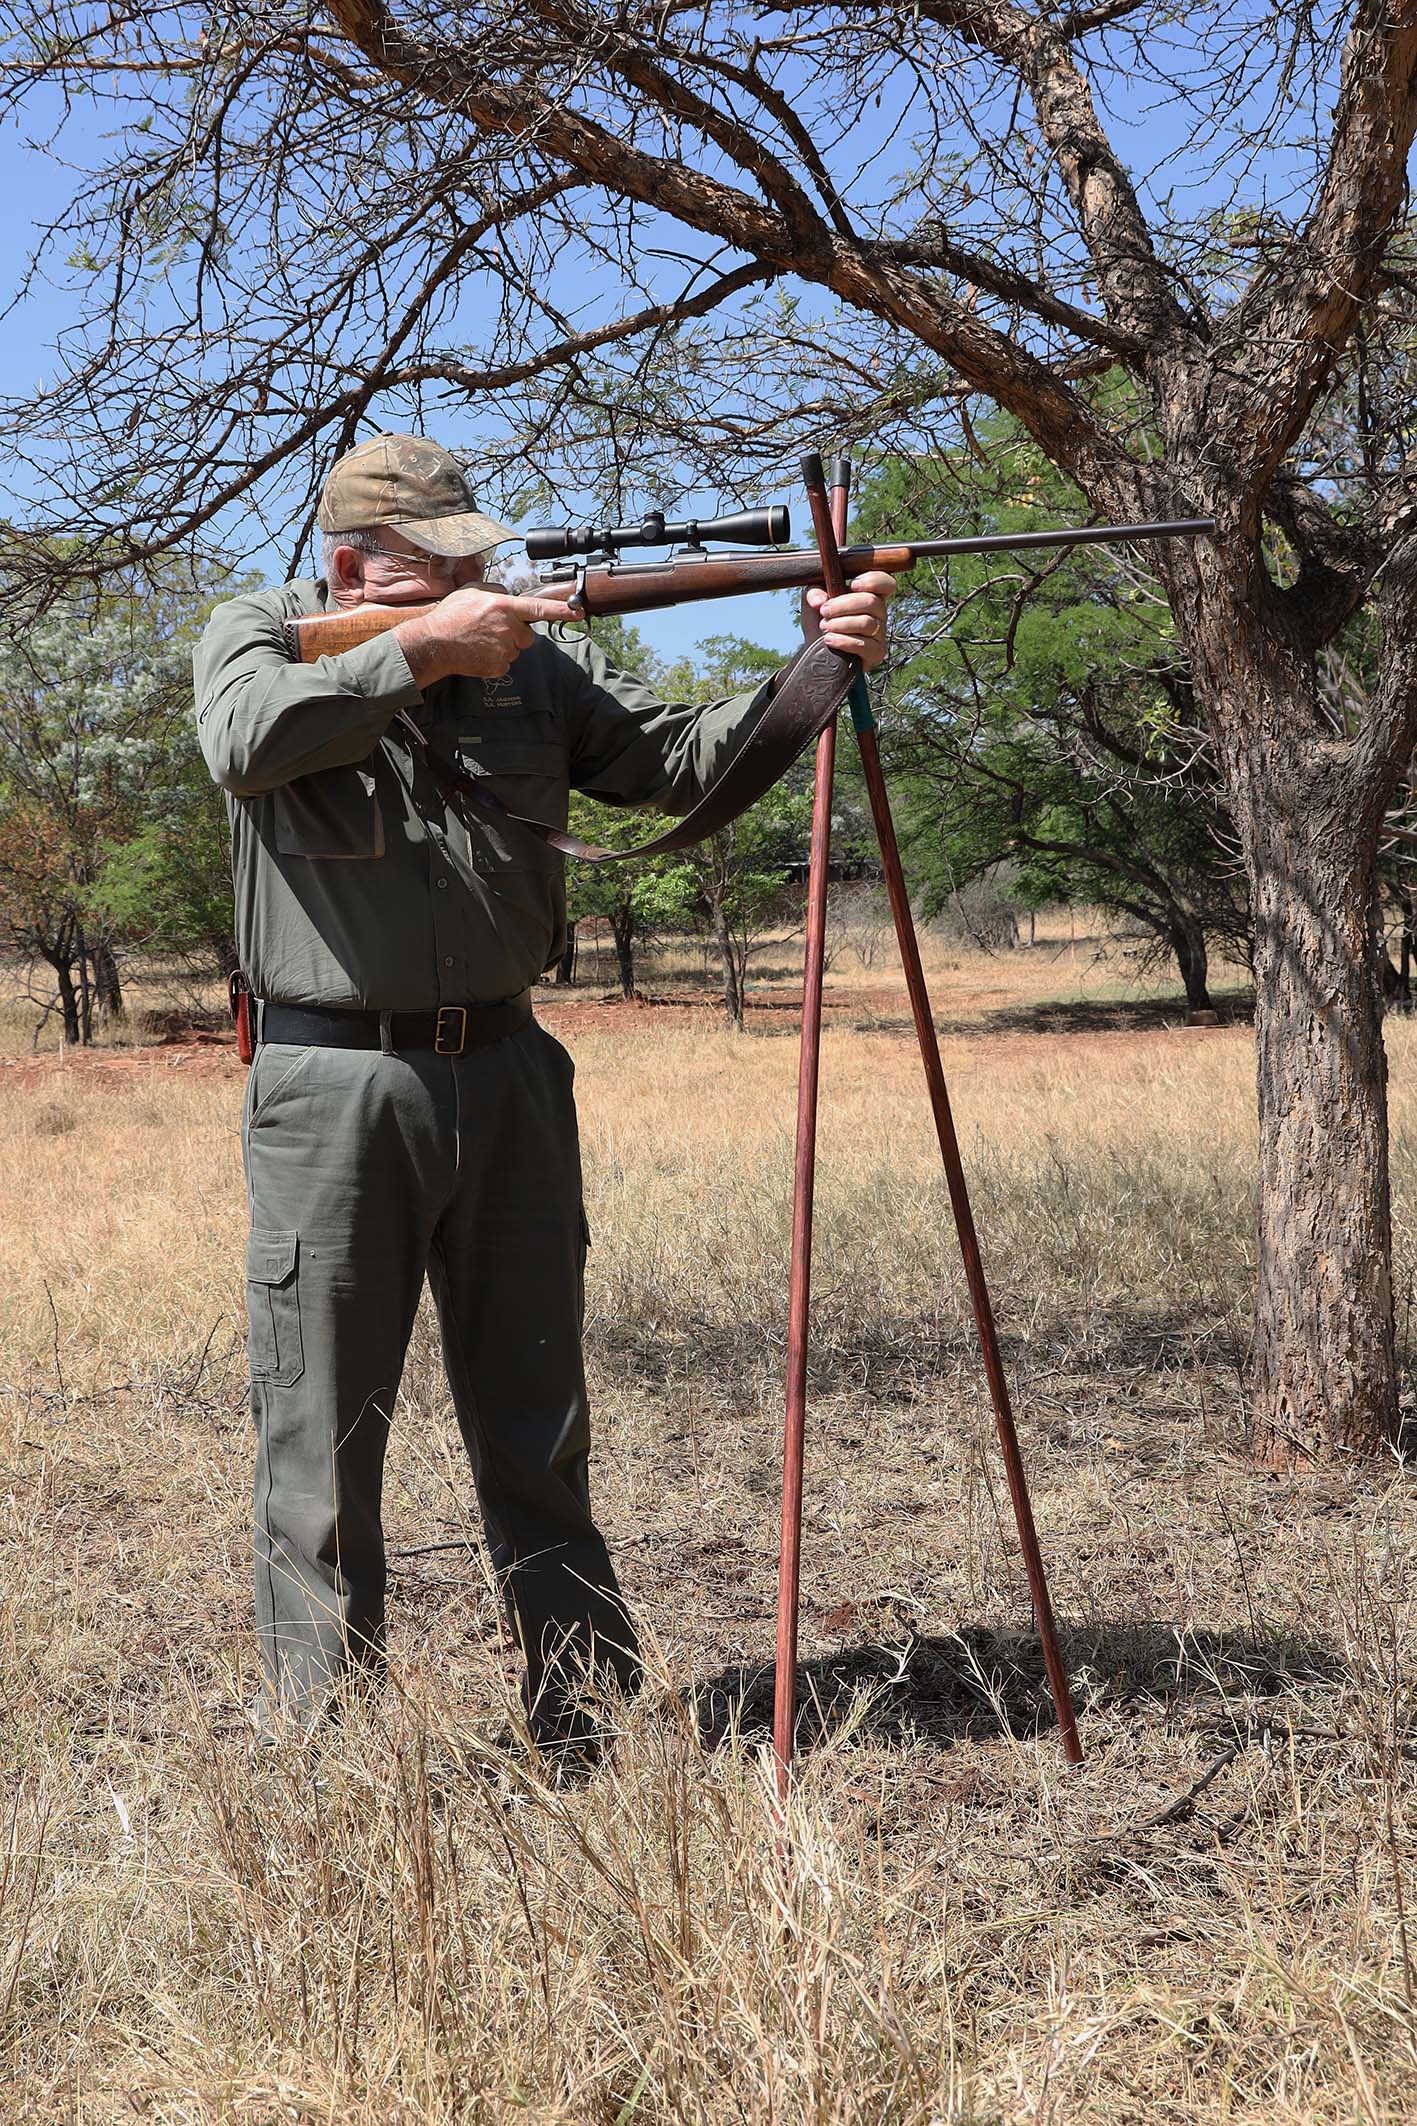
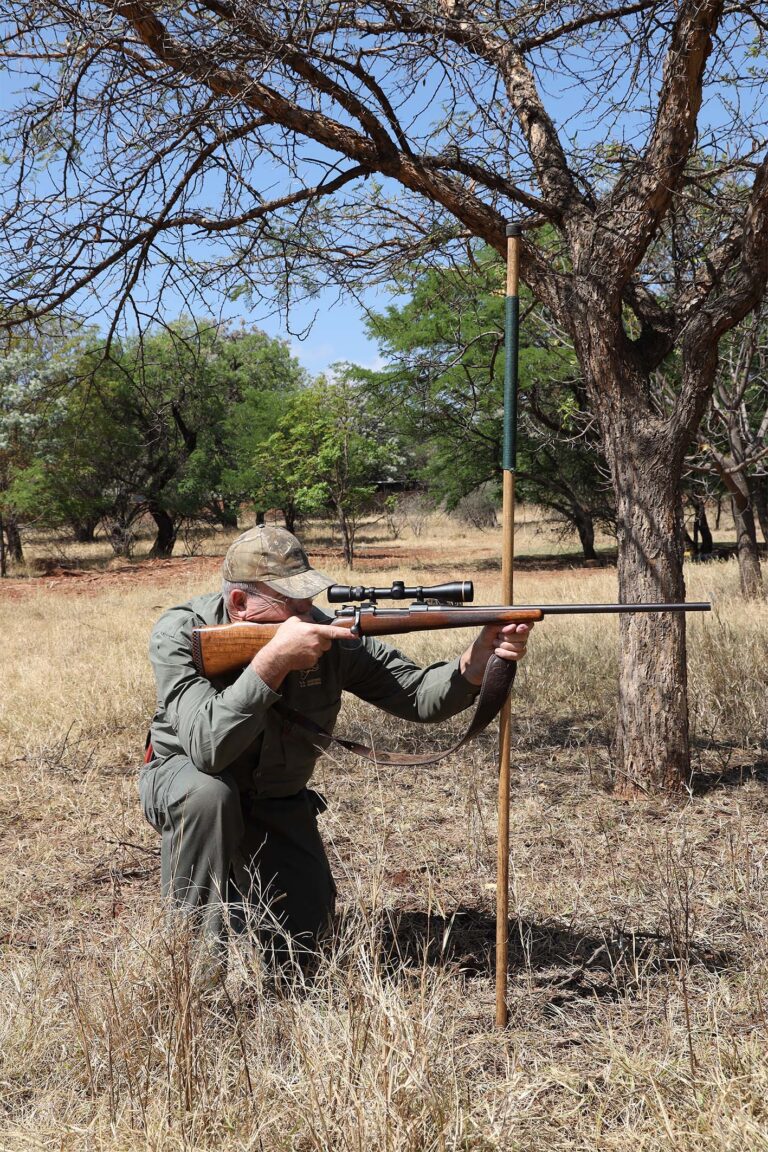
Double shooting stick: In 2020, I switched to a double shooting stick, consisting of two round poles, each 20 mm in diameter and about 1.8 m long, tied together at the top with a 2 mm thick nylon cord. When opened, the two poles form a deep “V” to cradle the rifle for a shot. It is still light enough to carry folded in my left hand and the legs open easily without assistance. It also serves as a sturdy walking stick.
As you get older, your shooting support should improve. I use a bipod shooting stick. My friend and farm owner, Herman de Lange (an outstanding/accurate hunter/shottist), who often hunts with me, is so impressed by how quickly I set up my rifle and shooting stick and the accuracy of my shots that he also switched to the bipod shooting stick. Herman often accompanies hunters as a guide and observes how long it takes them to get into a shooting position and fire their shot, with or without shooting sticks. It is a good idea to practise using a shooting stick in different shooting positions until you can do so instinctively.
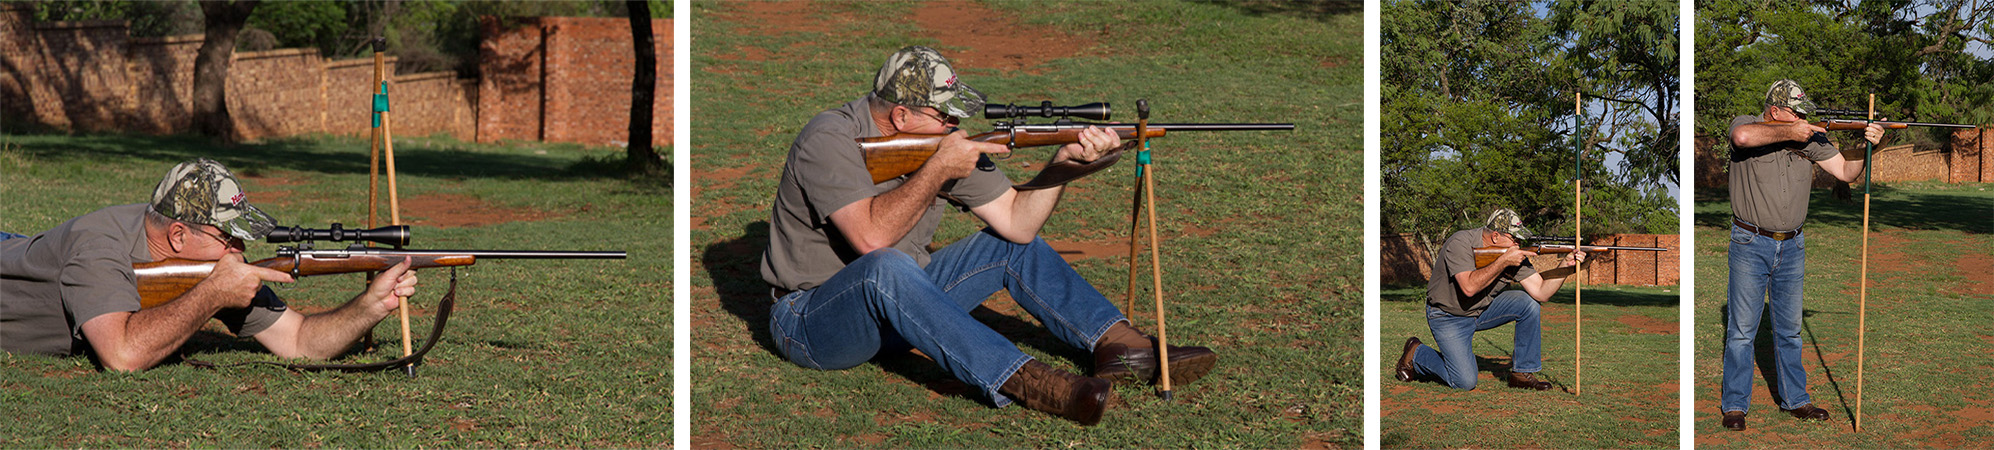
A simple bipod shooting stick, with the two sticks tied together with a 2 mm nylon cord, and the tips protected with short lengths of 20 mm diameter plastic pipe. Insert a screw of 4 mm diameter at the bottom end of the stick with about 6 mm protruding and blunted to stop the feet from slipping. I stand as upright as possible for a comfortable shot, gripping the rifle sling and the stock against the shooting stick to prevent the stick from falling down and managing the rifle’s recoil.
Standing position with double shooting stick
The sticks are tied together with nylon twine to form the V when the sticks are opened
Single shooting stick in the kneeling position, with the right elbow supported on the thigh
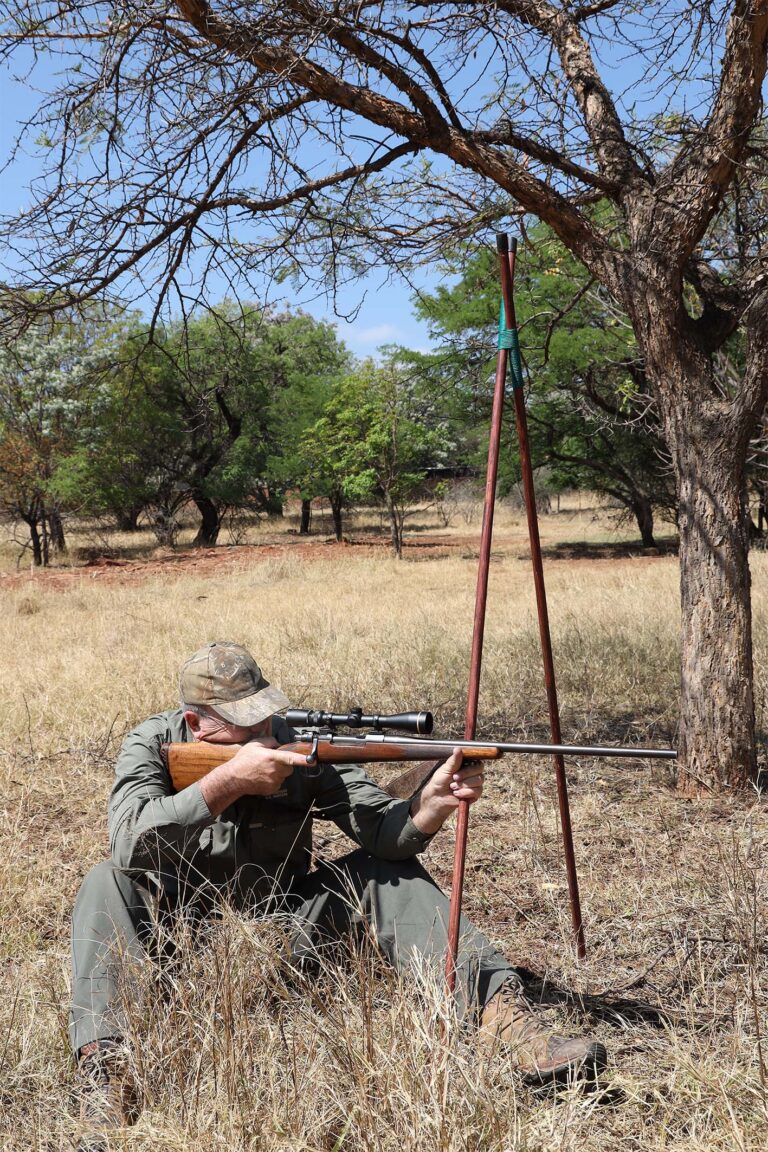
The sitting position is usually used for shots over longer ranges (100m and further) if vegetation allows. Both elbows rest on the knees, and the rifle sling is used for additional stability.
Other types of shooting sticks
Choose your shooting sticks carefully. Adjustable shooting sticks seem like a good idea, but there is not always time to fiddle with the length if you need to shoot quickly. I prefer long, continuous shooting sticks for their versatility. The different heights for standing, kneeling, and sitting positions are all possible without any adjustments.
Important: Despite the difficulty of taking shots from a freehand standing position, it is a shooting position that hunters should practise frequently. Mastering it for consistent, accurate shots, especially at short range, greatly increases your hunting opportunities. Furthermore, the freehand prone, sitting, kneeling, and standing shooting positions form the foundation of shooting skills that every hunter should perfect. From there, any other shooting position becomes easy!
Key message
During a bushveld hunt, the hunter often gets very close to the game and must shoot before the animal detects him (sees, smells, or hears him). At that moment, everything comes together for a successful kill shot! – equipment, shooting sticks, shooting position, and the hunter’s shooting skills.
The hunter must practise his shooting position with his equipment until he can do it instinctively for an accurate shot under bushveld hunting conditions. Practise on the shooting range to determine how quickly you can take a shot. Walk or stand relaxed and have someone point out a target with the command to shoot. The goal is to fire within 3 to 5 seconds from the given command at short distances from a standing position with shooting sticks.
During simulations, apply all basic safety rules by ensuring no ammunition is in the magazine or chamber of the rifle. Always adhere to safety measures when you switch to live-fire exercises on the shooting range.
About the author
André van der Merwe is a dedicated consumptive hunter who has nurtured his passion for hunting over the past 60 years. During the last three decades, he competed regularly in hunting rifle and field shooting competitions. In 2006, he joined SA Hunters as the Manager, Branch and Shooting Affairs, to support the association’s 83 branch committees. As secretary of the shooting committee, he coordinates shooting activities at branch, regional, and national levels, and promotes and stimulates sport shooting. His commitment to mentoring the next generation of firearm owners, shottists, hunters, and custodians of our natural and cultural heritage is at the heart of his legacy. Read André’s biography here.